SUCHY'S PLACE   DESIGN   MODELS              
           COMPUTERS   ART   ABOUT JOHN  

LAYOUTS

The first thing you have to do with any but the most basic model train setups is design it.  You lay out where you want everything to go – hence the term "layout" came to be used for the resulting model as well.  These days there are a number of programs available to use on computers.  I've been using and been very happy with it.  But that wasn't true when I built my last layout.  And even the best plan usually has to be changed when things don't fit.  As an example, note that my plan (first picture below) had a straight shot into my box canyon, while the 8th picture shows I had to toss in a pair of curves to clear the tunnel.

MY Z LAYOUT


     I built this layout between 2001 and 2003. I call it a model railroad rather than a toy train because I spent a lot of time putting in details to make it look real. The guage (scale) designation, "Z", means that this is the smallest commercially available scale of model railroading: the rails are less than 1/2" apart.  This is a pain for detailing but allows for some neat tricks:
     *You can buy HO scale trees and split off branches to be whole trees in Z.
     *The trains are so light you can cut up styrofoam and foam core for track support.
     *And you can print out great looking brick and stone walls, tunnel portals and even
          buildings to fit your needs.
     My major construction materials were foam core art board, styrofoam, Peco Z guage track, ultra thin scale wood strips (for bridges and trestle), sandpaper (for gravel), Card Stock (heavy paper -- for walls and tunnel portals), Liquitex Acrylic Paints (Green for vegitation and various browns for "mud") and onion skin tracing paper (for bare rock).

    
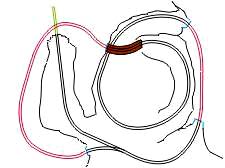
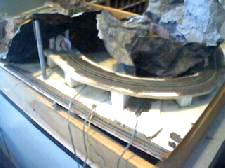
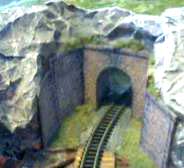
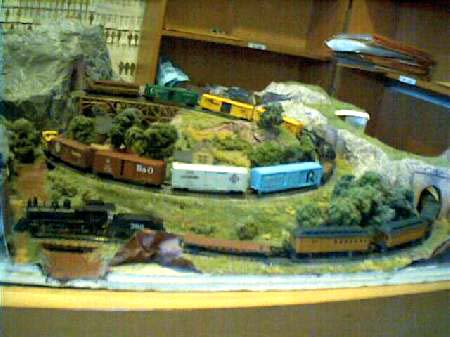
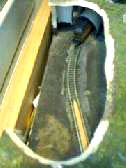
The first step after assembling the materials was to arrange the track and mark its location on the foam board. This image is not to scale but shows the locations of trestle, tunnels and the burried siding end. This shows basic construction. The bottom foam board was left whole as a lightweight layout base. Then I cut a second foam board about 3x the track width for the bed. You can see that I use the paint for glue. This shows the results of the printed masonry and the paper rocks. This portal is nearly hidden at the back of the layout
    
These pictures show the trestle and other wood items. These are the only things I used transparent wood glue on, for obvious reasons. After tracing the dimensions on glossy paper, I first glued the cross planks together, then attached the horizontal beams to their bottom, and finally assembled the rest in place. More of the scale planks made up the old-style wagon crossing. The stream is still just a bed -- I haven't figured out how to make good looking Z water. But note the lamp pole just in front of the station. I ran the wiring in a groove cut in the bottom plate over to the back area (the second photo above).
    

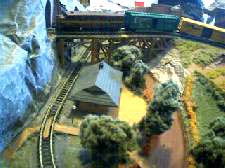
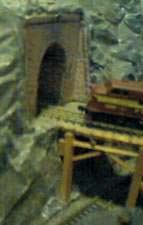
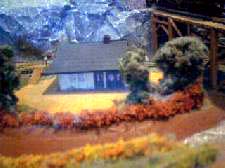
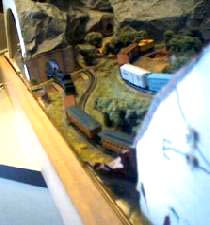
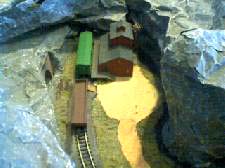
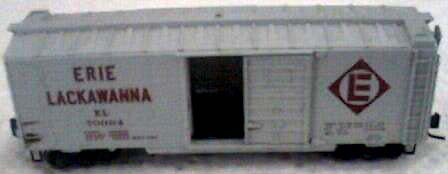
A closer view of the station.  When I built this layout, the only affordable buildings were the Marklin blocks of cast rubbery plastic.  I couldn't put lights in them, but I did manage to paint the windows, doors, roofs and chimneys. This view, in addition to a clear look at my one turnout, shows the switches I installed to control it.  Again the wires are grooved in to the bottom of the table.  I was planning to build my own super throttle control. This is the blind canyon that the spur line runs into.there's another painted building from Marklin with another lamp post.  Note also the man-sized mine entrance and the barely visible sluice used to supply "water" to the factory.
    

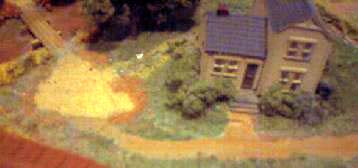
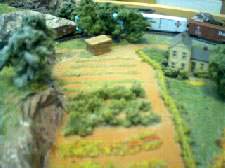
Not much to say about the farm house. It's another Marklin. I tried to show the walkway and flower gardens, but couldn't get them to show up well. No lamp posts here, but note the wood bridge across the stream. The garden was easy. You just paint the ground "dirt" then when it dries paint a line of dirt and sprinkle plants in it. The shed and a picnic table had to be built from scrap "lumber". A mountain sits here unless a train gets stuck. To reduce that I put in a custom re-railer.

This is the finished end of my layout.  It had been several years since I had done much with it besides vacuuming it for these photos.  Not all the dust came up so much of the plant life looks grey.  If anyone is interested almost all my rolling stock was functional and visible in these pictures, although the boxcars often had trouble on the trestle twist.  And this is a closer look at the trains:


Around 2013 I had to move and sold everything due to lack of space, but I still love the hobby and want to build again.

MY PLANS     TECHNIQUES     STRUCTURES


Copyright © 2009, 2020 by John E. Suchy.  All legal rights reserved.