SUCHY'S PLACE
DESIGN
MODELS


|

 | COMPUTERS ART ABOUT JOHN |
|
SUCHY'S PLACE
DESIGN
MODELS
|
| COMPUTERS ART ABOUT JOHN |

| ||
Shingle Roof w/ Door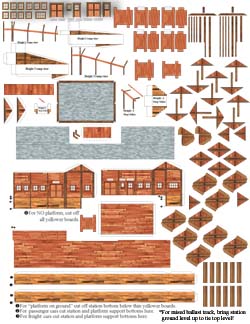
| ||
Shingle Roof no Door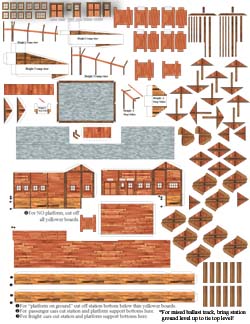
| ||
Shake Roof w/ Door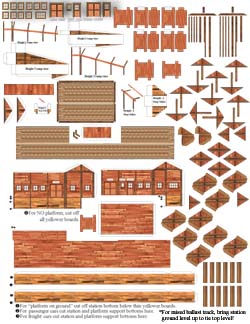
| ||
Shake Roof no Door
|